
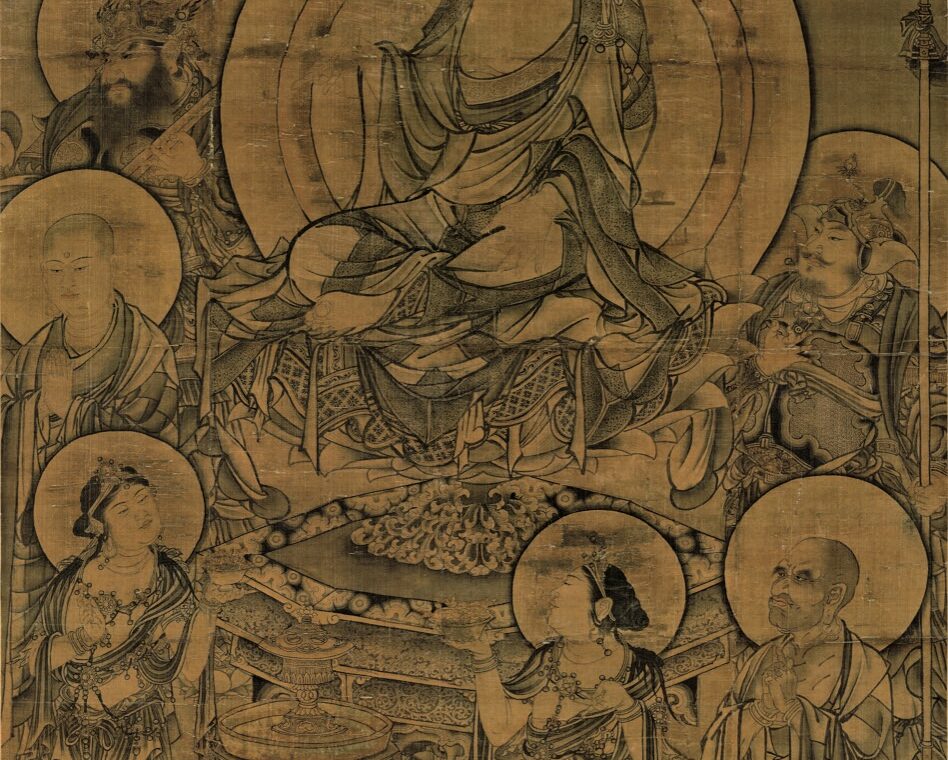
A thangka condition report is a dated record of what can be seen before a painting is handled, stored, loaned, photographed, or considered for treatment. It does not diagnose every cause of damage, and it is not a restoration plan. Its first job is simpler: establish a reliable baseline so that later change can be recognized.
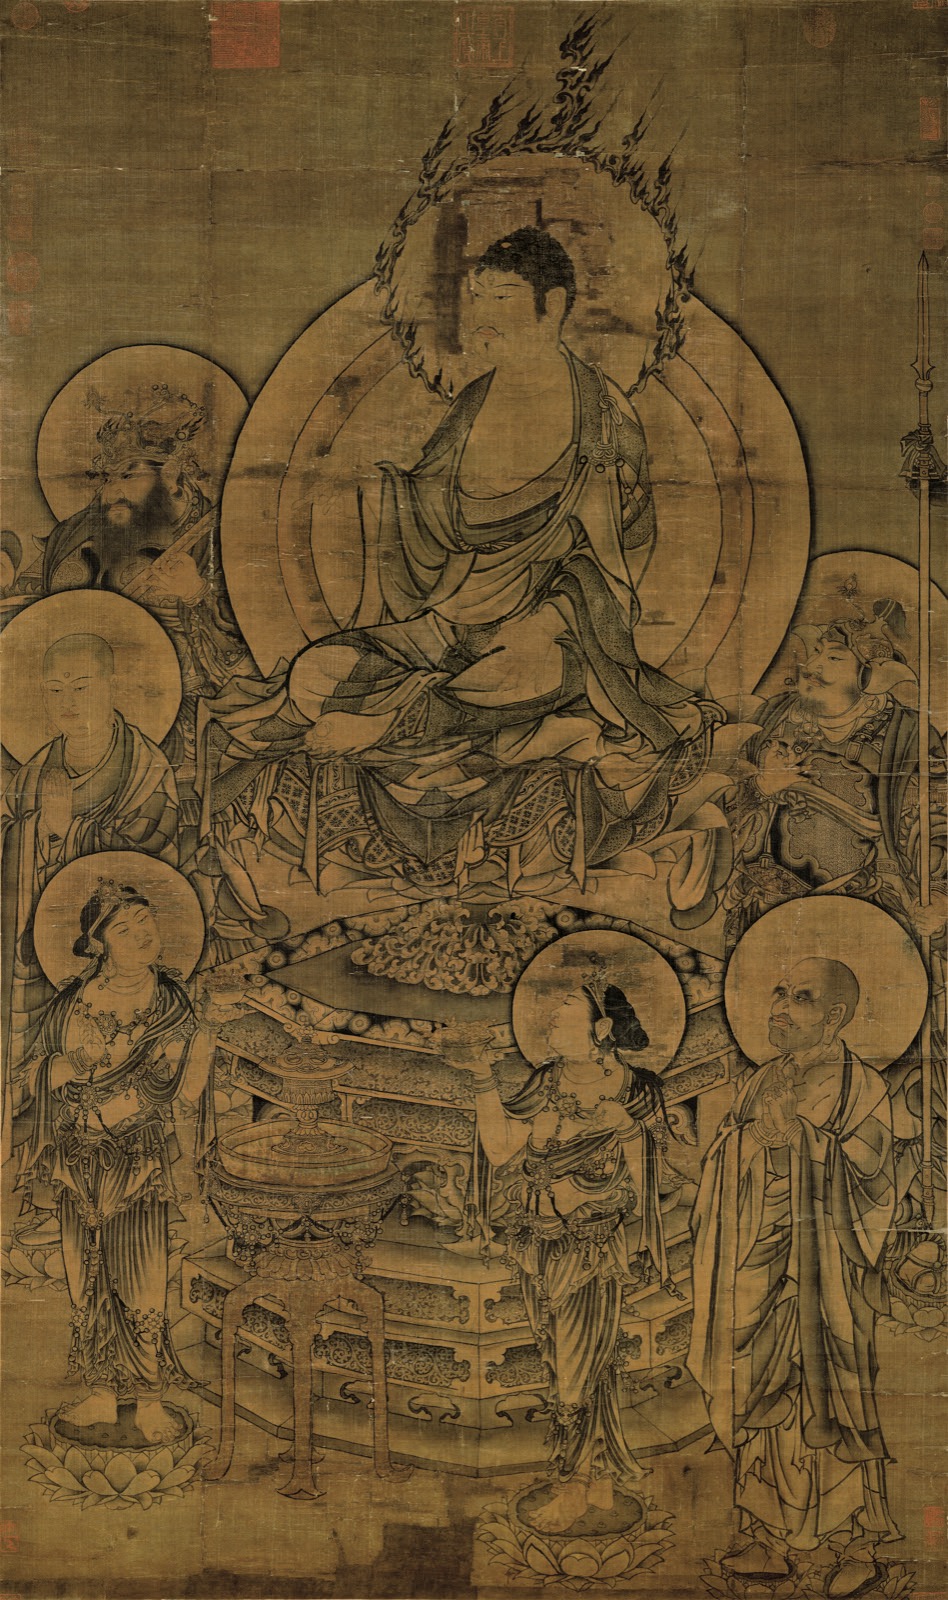
TK0226 makes a useful study image because linear creases, uneven color, surface abrasion, and numerous seals are visible even in a digital reproduction. Those features should be described separately from iconography. To interpret the figures and teaching composition, first consult our guide to the Buddha preaching assembly. The checklist below focuses instead on physical evidence and responsible documentation.
What a thangka condition report should accomplish
A baseline report identifies the object, records its present structure and appearance, maps observed alterations, and attaches photographs made under known conditions. It should let another reader locate the same feature without guessing. “Small horizontal crease, 7 cm from the lower edge” is more useful than “some damage at the bottom.”
The Canadian Conservation Institute distinguishes baseline reports from shorter periodic or purpose-based inspections. A baseline is comprehensive; a later inspection records changes; a purpose-based report may concentrate on risks before a loan, display, or treatment. This distinction prevents routine notes from overwriting the original evidence. CCI’s condition-reporting introduction is a valuable general reference for painted collections.
Record facts before interpretations
Begin with observable facts: dimensions, orientation, mounting components, inscriptions, seals, tears, losses, distortions, stains, and repairs. Put hypotheses in a separate field and label them uncertain. A dark area may be original pigment, accumulated dirt, aged coating, moisture staining, or a photographic artifact. A screen image cannot reliably settle the question.
This discipline is especially important for Buddhist paintings. A faded attribute can change identification, while a later inscription may be mistaken for an original caption. Use our beginner’s guide to reading a Thangka for visual orientation, but never use iconographic expectations to “fill in” missing physical evidence.
Step 1: identify the object and its documentation context
Place the accession number or stable collection ID at the top of every page and image file. Add the English title, local title, current location, examiner, date, reason for examination, and the source of any attribution. Note whether the object was examined in person, through glazing, in a frame, partly unrolled, or only through a digital file.
For TK0226, the TK number is the stable identifier. The supplied filename gives a Buddha preaching title and a Song Dynasty association. Those catalog statements are worth preserving, but they are not independently verified by the image. A responsible record therefore repeats the source wording and marks the attribution uncertain rather than presenting it as a new conclusion.
Step 2: describe the complete structure
Traditional Thangka construction can combine a painted textile support, borders, veil, dowels, cords, leather or textile details, and later mounting materials. East Asian Buddhist scrolls may have different mounting systems. Describe what is actually present instead of forcing the object into a standard template.
Record the relationship between the painted field and mount. Look for tension at stitched edges, misalignment, trimming, exposed threads, rigid adhesive joins, and abrasion where rods or covers touch the surface. On the reverse, note labels, inscriptions, transferred pigment, tidelines, repairs, and backing layers, but never separate layers to investigate them. If glazing or a sealed frame prevents access, describe that limitation. Measurements should distinguish the painted area from the overall mounted dimensions. A later mount can be historically significant, so document its materials and condition instead of assuming that it should be replaced. This matters for later storage and loan decisions.
Record the support material only when it can be identified with confidence. “Woven textile support” is safer than “cotton” when no fiber examination has been made. Note seams, joins, patches, lining, edge reinforcements, hanging hardware, and whether the painting lies flat. Photograph the front, back, edges, labels, and mounting details whenever access permits.
Use a consistent location system
Divide the image into upper, center, and lower zones, then use the viewer’s left and right. For complex features, overlay a numbered grid on a reference photograph. Do not draw on the object or its historic mount. Each number should correspond to a short entry describing feature type, size, direction, color, and apparent stability.
Step 3: examine the painted surface systematically
Work from overall condition to local details. Start in normal diffuse light, then use raking light and magnification only when the object can be examined safely. Digital zoom can reveal patterns, but it may also exaggerate compression, sharpening, and color imbalance. CCI’s examination checklist recommends appropriate lighting, a clean padded surface, measuring tools, photography, and diagrams for mapping damage.
Describe these categories separately:
- Distortion and creasing: planar deformation, rolling memory, hard folds, cockling, or local bulges.
- Support damage: tears, punctures, open seams, frayed edges, losses, weakened fibers, or detached mounting elements.
- Paint instability: lifting, flaking, powdering, cleavage, or active loss. These require prompt professional assessment.
- Surface change: abrasion, scratches, deposits, accretions, tide lines, soot-like darkening, or uneven gloss.
- Color change: fading, darkening, discoloration, or differences that may relate to exposure, materials, retouching, or photography.
- Biological evidence: insect holes, webbing, casings, droppings, mold-like growth, or odor. Isolate concerns and seek qualified advice.
- Previous intervention: patches, fills, overpaint, adhesive residues, backing changes, trimming, or altered hanging hardware.
In TK0226, broad horizontal and vertical linear changes are visible across the field, along with rubbed or thinned areas and an overall dark, uneven tone. These are observations from the reproduction, not proof of their causes. Whether a line is a crease, repaired split, silk weave feature, or imaging artifact remains uncertain until the original is examined under controlled light.
Step 4: make photographs useful for comparison
A photograph becomes evidence only when it can be compared. Capture an overall front view square to the object, a back view if safe, and details of every mapped concern. Include a color target, scale, object ID, and date where institutional practice allows. Keep an untouched archival master and record any crop, color adjustment, or compression applied to access copies.
Use repeatable camera position, lighting direction, exposure, and file naming during later inspections. Comparison fails when one image is warm and dim while the next is cool and highly sharpened. For format choices, see our guide to JPG versus TIF for Thangka art. TIF is often preferable for preservation masters; a carefully exported JPG is practical for web access and reference.
Step 5: grade urgency without prescribing treatment
A condition report may classify features as stable, potentially active, or active, but the criteria must be defined. Fresh detached flakes, growing tears, dampness, mold-like activity, or evidence of live insects are urgent. Old stains, historic creases, and previous repairs may be stable, yet still need monitoring. Compare dated photographs before claiming that a condition is changing.
Do not clean, flatten, tape, humidify, consolidate, or retouch a historic painting as part of documentation. These are interventions, not reporting steps. If paint appears loose or the support is structurally weak, stop handling and consult a conservator experienced with painted textiles or Asian scroll mounts. A report supports treatment decisions; it does not replace material examination or professional judgment.
Practical thangka condition report checklist
- Confirm the stable ID, title, owner, location, examiner, date, and purpose.
- State the examination limits: in person, framed, glazed, rolled, or digital only.
- Record dimensions and all mounting components without guessing materials.
- Photograph overall front and back views, edges, labels, inscriptions, and seals.
- Map distortions, tears, losses, stains, deposits, abrasion, and paint instability.
- Measure and locate each important feature with consistent directional language.
- Separate direct observation from uncertain attribution or cause.
- Identify urgent risks and stop handling when material appears unstable.
- Store unedited master photographs and link them to the written record.
- Schedule comparison inspections and append changes instead of erasing the baseline.
Conclusion: build a record that can detect change
The best thangka condition report is specific, repeatable, and modest about uncertainty. It identifies the object, describes structure, maps visible condition, and preserves photographs that future custodians can compare. It also keeps conservation separate from iconographic interpretation. High-resolution study can help locate questions, as explained in our guide to studying Thangka iconography with detailed images, but direct examination remains essential for material conclusions.
For TK0226, the digital image supports a preliminary condition fingerprint, not a full conservation diagnosis. Its creases, rubbed passages, seals, and tonal variation can be logged now; their materials, causes, dates, and stability remain uncertain until examined in person. That distinction makes the record useful rather than speculative.
Download the full Thangka image collection
Continue browsing and download the full TANGKAWORLD image collection for comparative study, visual identification, and collection research. Preserve the original files, record each TK number, and create separate working copies for annotation or web use.