
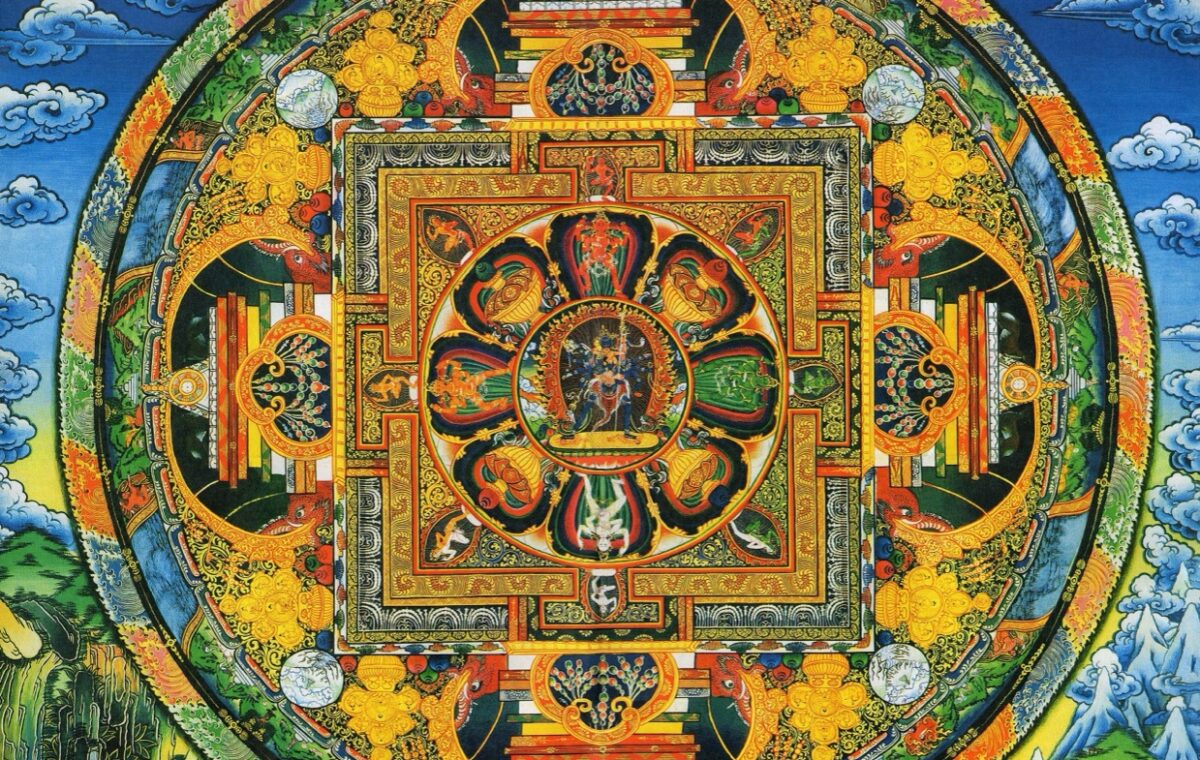
High-resolution images make thangka iconography easier to study because they let you move between the entire composition and small identifying details. The most reliable method is systematic: begin with the central figure, record visible attributes, examine surrounding figures and spatial structure, then compare your observations with specific museum or specialist records. Resolution improves what you can see, but it does not replace inscriptions, provenance, technical examination or documented scholarship.
Prepare a repeatable viewing setup
Use an image viewer that can display the file at 100 percent and move quickly between fit-to-screen and detail views. Keep the original file unchanged. If you need to crop, annotate or adjust contrast, work on a copy and record what was changed. A calibrated monitor is helpful for color-sensitive work, but even an ordinary screen can support careful study when brightness and automatic color filters are kept consistent.
- Create a folder for the original image, working copies and notes.
- Record the source URL, object title, institution, accession number and access date.
- Note the file format, pixel dimensions and any stated color profile.
- Use the same naming pattern for all comparison images.
- Separate what is visible from what a catalogue or secondary source claims.
Step 1: Read the whole composition
Start with the image fitted to the screen. Identify the strongest visual center and the large structural zones above, beside and below it. Ask whether the work presents a single figure, a lineage assembly, a narrative, a pure-land scene or a mandala. Note symmetry, directional gates, halos, throne structures, landscape bands and the arrangement of smaller figures.
This first pass prevents a common error: identifying a painting from one isolated detail while ignoring the composition that gives the detail meaning. In a mandala, for example, a small implement may belong to a directional figure rather than the central deity.
Step 2: Record the central figure
Zoom in gradually and make a neutral description before naming the figure. Record body color, number of faces, arms and eyes, seated or standing posture, hand gestures, held objects, clothing, ornaments, crown, halo, seat and mount. Write “right hand holds a vajra” rather than “this is Vajrasattva” until several attributes support the identification.
| Feature | Questions to record | Why it matters |
|---|---|---|
| Body and faces | Color, number of faces, expression, third eye | Helps distinguish peaceful, semi-wrathful and wrathful forms |
| Hands and arms | Number, gesture and object in each hand | Attributes often provide the strongest identification clues |
| Seat or mount | Lotus, throne, animal, corpse or standing base | May distinguish related figures or ritual forms |
| Dress and ornaments | Monastic robes, jewelry, bone ornaments, crown | Separates Buddhas, bodhisattvas, teachers and protectors |
| Surrounding field | Flames, clouds, landscape, aureole, palace | Clarifies activity and compositional context |
Step 3: Examine attributes at full size
At 100 percent, inspect the objects held in the hands and placed near the figure. A sword may be flaming or plain; a vessel may be a medicine bowl, longevity vase or ritual cup; a flower may support a book, wheel or other emblem. These differences can be only a few dozen pixels in a screen preview but clear in a larger source file.
Do not use color as the only clue. Pigments age, photographs have color casts and different traditions may portray the same figure in more than one form. Combine color with gesture, objects, posture and surrounding figures.
Step 4: Move through the hierarchy
Study the top register, side figures and lower register in a fixed order. Teachers and lineage figures often appear above the central figure. Attendants or related deities may occupy the sides. Protectors, offerings, donors or narrative scenes can appear below. High resolution helps reveal whether a small figure carries a distinctive object or wears a particular hat.
Make a diagram or numbered list rather than trying to identify everything at once. If a figure is unclear, describe it and mark the identification as uncertain. A transparent unknown is more useful than a confident but unsupported label.
Step 5: Read mandalas from outside inward
For a mandala, begin with the outer boundary and move toward the center. Record circles of flames, vajras or lotus petals; directional gates; palace walls; corner colors; courts; resident figures; and the central deity or emblem. Compare the pattern with a specifically identified mandala record, not with a visually similar thumbnail.
The distinction between format and subject is important. A thangka is a portable sacred image format, while a mandala is an organized sacred environment or diagram. A mandala may be painted as a thangka, but many thangkas are not mandalas. Our guide to what a thangka is explains this difference in more detail.
Step 6: Look for inscriptions and material evidence
Inspect borders, reverse impressions, labels, seals, captions and damaged areas. A high-resolution image may make text visible enough to record, but transcription and translation require language expertise. Avoid guessing a date or artist from a seal or handwriting style without a reliable comparison.
Digital images also have limits. They flatten texture, hide the reverse, may omit textile mounts and can contain stitching, sharpening or color-management artifacts. Physical examination and technical imaging may be required for material identification, condition assessment and authentication.
Step 7: Compare with specific records
Once you have a visual description, search for combinations of attributes rather than a presumed name. Compare several museum object pages and specialist records. The Metropolitan Museum of Art’s overview of Tibetan Buddhist art provides historical context for regional exchange and anonymous workshop production. The Rubin Museum’s process of thangka painting helps connect visible features with preparation, drawing, color and mounting.
Prefer the most specific object URL available. A search-results page can help discovery, but an object record is a stronger citation because it identifies the exact work and usually includes accession data, materials and a rights statement.
Build a comparison sheet
For recurring study, create a simple table with one row per image and columns for the central figure, body color, posture, hands, attributes, seat, surrounding figures, composition type, source, accession number and confidence level. Add a link to the source and a note explaining any uncertainty. This turns visual browsing into a traceable research method.
Side-by-side comparison is especially effective for related subjects such as Green Tara and White Tara, Medicine Buddha and other blue figures, or Amitayus and Amitabha. Similarity can suggest a question, but the final identification should be supported by the full set of visible attributes and documented records.
Choose the right image format
JPG files are convenient for browsing and comparison; TIF files are useful when the source contains additional detail and your workflow can handle the larger size. File format alone does not prove quality. Our JPG versus TIF guide explains compression, storage and printing considerations.
For an offline comparison library, the TANGKAWORLD thangka image collection includes the same 1,512 images in a 15.04 GB JPG version and a 331.5 GB high-resolution TIF version.
Use a confidence scale for identification
A confidence label makes your notes more honest and more useful. Use confirmed when a reliable object record or inscription identifies the work and the visible attributes agree. Use probable when several distinctive features match a well-documented form but the specific object lacks a reliable label. Use possible when only part of the evidence matches. Use unidentified when the image does not support a responsible conclusion.
Record the reason beside the label. “Probable White Tara: white body, seven eyes and utpala flowers visible” is more valuable than a bare name. The reasoning can later be reviewed if a better image, translation or catalogue entry appears.
Annotate without replacing the evidence
Annotations are useful for marking hands, attributes, small teachers, gates or damaged passages. Put them on a copy and keep the original visible. Numbered callouts are often better than painting directly over a figure because they preserve the shape and color beneath the note. Add a key that distinguishes observed facts from interpretations.
- Use one color for directly visible features and another for uncertain identifications.
- Record the zoom level or crop location so the detail can be found again.
- Do not erase cracks, stains or missing paint in a research copy.
- Keep the full composition beside every detail crop.
- Export a non-annotated crop from the same area for comparison.
A comparison exercise: Green Tara and White Tara
Choose several documented examples of each figure and build two columns. At fit-to-screen size, note the overall posture and body color. Then zoom into the hands, face, legs and lotus flowers. Green Tara is often shown with a green body and one leg extended in a posture of readiness. White Tara is commonly white, seated in meditation and represented with seven eyes, including eyes on the forehead, palms and soles. These are recurring clues, not a substitute for the complete iconographic context.
Next, record what varies: the number and identity of attendant figures, landscape, crowns, textile patterns, inscriptions and lineage teachers. This shows why recognition depends on stable attributes while dating or locating a work requires different evidence. A modern copy can repeat an old iconographic pattern accurately; visual similarity does not establish age.
Repeat the exercise with Medicine Buddha and other blue figures. Start with the medicine bowl, hand gestures, robes and surrounding assembly. If a held object is unclear, mark it uncertain and search for a higher-resolution or differently lit view rather than guessing from color.
Measure details instead of relying on dramatic zoom
Image viewers can enlarge a file far beyond 100 percent, but magnification does not add information. When a detail matters, record its approximate pixel dimensions and compare it with the source capture. An attribute only ten pixels wide may remain ambiguous even when displayed across the screen. A cleaner source or physical examination may be necessary.
For printing or publication, keep the full-resolution crop, note the original file and avoid presenting an enhanced detail as if it were untouched. Sharpening and contrast adjustments can aid visibility, but they can also exaggerate boundaries or hide abrasion.
What high resolution cannot answer
A detailed photograph cannot show the reverse of a painting, internal textile construction, pigment chemistry or features outside the crop. It cannot by itself confirm when, where or by whom the work was made. Digital color may differ from the object because of lighting, camera settings, profiles and display conditions. Provenance also remains a documentary question.
Treat high resolution as an observation tool. Combine it with specific object records, inscriptions, material analysis and published scholarship. When those sources disagree, preserve the disagreement in your notes instead of choosing the most convenient answer.
Create a reusable iconography worksheet
Use the same sequence for every work: source record, whole composition, central figure, attributes, surrounding hierarchy, inscriptions, material clues, comparisons and confidence level. A repeatable worksheet reduces confirmation bias because you gather the evidence before settling on a name. It also makes your analysis readable to someone who has not seen the image before.
Include a final “unanswered questions” field. Questions such as “Is the object in the upper right a book or a jewel?” or “Does the lower inscription name a donor?” guide the next search more effectively than an unsupported conclusion.
Related visual-reading guides
Practice the method with the beginner’s guide to reading a thangka, then compare the Green Tara and White Tara identification guides. For a complex spatial composition, use the Kalachakra Mandala structure guide.